|
Größe: 11199
Kommentar:
|
← Revision 17 vom 05.07.2016 13:36 ⇥
Größe: 23164
Kommentar:
|
| Gelöschter Text ist auf diese Art markiert. | Hinzugefügter Text ist auf diese Art markiert. |
| Zeile 1: | Zeile 1: |
| #acl AdminGroup:read,write,admin,revert IngoB:read,write BetatesterGroup:read,write quadrocopter:read,write All: <<RedBox('''Nur für internen Gebrauch !''')>> ||<tablewidth="520px" tablestyle="text-align: center;"#ffffa0> {{http://mikrokopter.de/images/deu.gif}} Seite in [[EasySetup/EasySetup|deutsch]] || siehe auch: [[Firmware-0.86|Firmware-0.86]] |
#acl AdminGroup:read,write,revert EditorsGroup:read,write,revert All:read ############################################################################## {{{#!wiki caution ||<class="MK_TableNoBorder" width="70%">'''Diese Seite befindet sich derzeit in der Überarbeitung. <<BR>><<BR>> This page is currently under revision''' ||<class="MK_TableNoBorder" >{{attachment:symbols/Trenner2.png}}|| }}} ############################################################################## ############################################################################## ## Navigation oben ---- {{{#!html <div style="float: left; margin-right:20px;"> }}} '''__Quick selection__'''<<BR>> '''Open the description -> click Button''' <<BR>> [[en/EasySetup/EasySetup|{{ http://gallery3.mikrokopter.de/var/albums/intern/KopterTool_ab_V2_0/Reiter/Reiter_aktiv-Easy-SETUP.gif?m=1409707309 }}]] [[en/EasySetup/Kanaele|{{ http://gallery3.mikrokopter.de/var/albums/intern/KopterTool_ab_V2_0/Reiter/Reiter-Kan_le_en.gif?m=1409707201 }}]] [[en/EasySetup/Kamera|{{ http://gallery3.mikrokopter.de/var/albums/intern/KopterTool_ab_V2_0/Reiter/Reiter-Kamera_en.gif?m=1409707200 }}]] [[en/EasySetup/CamCtrll|{{ http://gallery3.mikrokopter.de/var/albums/intern/KopterTool_ab_V2_0/Reiter/Reiter-CamCtrl.jpg?m=1464700388 }}]] [[en/EasySetup/Ausgaenge|{{ http://gallery3.mikrokopter.de/var/albums/intern/KopterTool_ab_V2_0/Reiter/Reiter-Ausg_nge_en.gif?m=1409707196 }}]] {{{#!html </div> }}} ############################################################################## ############################################################################## <<BR>> [[en/MK-Parameter|{{ http://gallery3.mikrokopter.de/var/albums/intern/KopterTool_ab_V2_0/Reiter/Reiter-Einstellungen_en.jpg?m=1464703564 }}]] ||<class="MK_TableNoBorder">~-This page as an '''PDF-Document'''? <<BR>>Click on that Symbol ...-~||<class="MK_TableNoBorder"><<PDFIcon>>|| <<BR>> ############################################################################## ############################################################################## ## Überschrift {{{#!wiki MK_Nav ||<class="MK_Nav_left": height= "60px">||<class="MK_Nav_Header">!EasySetup - Easy SETUP||<class="MK_Nav_right":>|| }}} {{{#!wiki MK_select1 * {{http://mikrokopter.de/images/deu.gif}} [[EasySetup/EasySetup|deutsch]] }}} ############################################################################## ############################################################################## ## Bild rechts {{{#!html <div style="float: right; margin: 15px;"> }}} {{ http://gallery3.mikrokopter.de/var/albums/intern/KopterTool_ab_V2_0/Einstellungen_ab_2_14/Button-350x350/en/01_en_KopterTool_EasySetup_EasySetup_Setting_%28350%29.jpg?m=1466430971 }} {{{#!html </div> }}} ############################################################################## ############################################################################## ## Inhaltsverzeichnis <<BR>> |
| Zeile 10: | Zeile 83: |
= Easy Setup = Im Easy Setup sind alle wichtigen Einstellungen des MikroKopters auf eine Seite zusammengefasst. <<BR>> Dies macht die erste Grundeinstellung des Kopters sehr einfach.<<BR>><<BR>> {{http://gallery.mikrokopter.de/main.php?g2_view=core.DownloadItem&g2_itemId=88140&g2_serialNumber=3}} == Name der Konfiguration == Es können im KopterTool bis zu 5 verschiedene Settings (Konfigurationen) eingestellt und gespeichert werden. In diesem Beispiel befinden wir uns im Setting '''Easy'''. <<BR>> Dieser Name kann auch individuell geändert und gespeichert werden. == Höhenregler == Der Höhensensor (Höhenregler) auf der FlightCtrl kann über den Eintrag '''''Höhenregelung aktiv''''' aktiviert- oder deaktiviert werden.<<BR>><<BR>> '''Die Funktion:'''<<BR>> Wurde der Höhenregler hier aktiviert, kann die Funktion '''automatisches Höhe halten''' über einen Schalter am Sender ein-/ausgeschaltet werden. <<BR>> Bei eingeschalteter Funktion übernimmt die Höhenregelung die vollständige Kontrolle über den Gesamtschub. <<BR>> Hierbei wird über den Gas-Stick nicht mehr die Drehgeschwindigkeit der Motoren beeinflusst. Vielmehr wird hierbei der Sollwert für die Höhe verschoben.<<BR>><<BR>> Beispiel: <<BR>> - Wird der Gas-Stick aus der Mittelposition nach oben bewegt, wird der Sollwert für die Höhen nach oben verschoben. <<BR>> - Ist der Gas-Stick in der Mittelposition, bleibt der Kopter auf der aktuellen Höhe stehen (+/- einer gewissen Toleranz), der Sollwert wird nicht verschoben.<<BR>> - Wird der Gas-Stick aus der Mittelposition nach unten bewegt, wird der Sollwert für die Höhen nach unten verschoben. <<BR>><<BR>> Hierbei gilt: Abhängig davon, wie weit der Stick nach oben (oder unten) verschoben wird, wird der Höhenwert schwächer oder stärker in die entsprechende Richtung verschoben.<<BR>><<BR>> {i} '''Info:''' Wenn man hier im EasySetup die Funktion aktiviert, wird automatisch der Mode "Vario-Höhe" aktiviert. <<BR>><<BR>> {i} Expertenfunktion: <<BR>> Mehr Informationen zu den Mode '''Vario-Höhe''', '''Höhenbegrenzung''' findet man hier: [[http://mikrokopter.de/ucwiki/MK-Parameter/Altitude|KopterTool-Höhe]]<<BR>> Wie der Höhenregler selber funktioniert und wie er eingestellt wird kann hier nachgelesen werden: [[http://mikrokopter.de/ucwiki/Höhensensor|Höhensensor]]<<BR>><<BR>> === Sollwert === Zum Schalten des Höhenreglers wird ein Schalter vom Sender genutzt. Dieser Schalter am Sender muss einem Kanal zugewiesen sein <<BR>> und im KopterTool einem "POTI" zugeteilt werden (die Zuteilung (Überprüfung) der Kanäle findet man hier: [[Kanaleinstellung]]). <<BR>> (Wie am Sender die Kanäle den Schaltern zugeteilt werden, kann in der Anleitung des Senders nachgelesen werden)<<BR>><<BR>> In diesem Beispiel ist dem Schalter auf dem Sender "Poti1" (Kanal 5) zugeteilt.<<BR>> So kann durch den zugehörigen Schalter am Sender die Höhenregelung aktivieren und deaktivieren werden. * aus: manuelle Gas-Steuerung * ein: Vario-Höhenregler über den Höhensensor === Stick Neutral Punkt === Normalerweise ist der Gas-Stick (throttle) auf "nicht neutralisierend" eingestellt. Er bleibt also nicht durch eine Feder gehalten, nach der Benutzung mittig stehen, wie der zweite Stick am Sender.<BR>> Hierfür wird als Wert standardmäßig eine "0" (0 = automatc) eingetragen. <<BR>><<BR>> |
<<BR>><<BR>><<BR>> ############################################################################## ############################################################################## = Overview -> Easy Setup = {{ http://gallery3.mikrokopter.de/var/albums/intern/KopterTool_ab_V2_0/Einstellungen_ab_2_14/Easy/01_en_KopterTool_EasySetup_EasySetup_Setting.jpg?m=1466431122 }} ############################################################################## ############################################################################## = Name of the configuration = You can set and save up to 56 different settings (Parametersets) in your copter.<<BR>> If needed a personal name you can enter here. {{ http://gallery3.mikrokopter.de/var/albums/intern/KopterTool_ab_V2_0/Einstellungen_ab_2_14/Details/en/en_NameKonfiguration.jpg?m=1466752706 }} In the basic settings the names are: * Parameterset 1 => ''Fast'' * Parameterset 1 => ''Agile'' * Parameterset 1 => ''Easy'' * Parameterset 1 => ''Easy'' * Parameterset 1 => ''Easy'' ############################################################################## ############################################################################## = Enable Altitude control = Here you can activate / deactivate the barometric altitude sensor on the !FlightCtrl. {{ http://gallery3.mikrokopter.de/var/albums/intern/KopterTool_ab_V2_0/Einstellungen_ab_2_14/Details/en/en_H%C3%B6henregelung_Aktiv_OFF.jpg?m=1466752684 }} => altitude sensor deactivated {{ http://gallery3.mikrokopter.de/var/albums/intern/KopterTool_ab_V2_0/Einstellungen_ab_2_14/Details/en/en_H%C3%B6henregelung_Aktiv_ON.jpg?m=1466752685 }} => altitude sensor activate If the barometric altitude sensor is deactivated you have to hold the altitude of the copter the whole time manually. <<BR>> Only if the sensor is activated you can use the function ''[[en/AltitudeHold|AltitudeHold]]'' and activate this e.g. via a switch on your transmitter.<<BR>> Then the copter can hold the altitude automatically. |
| Zeile 58: | Zeile 130: |
| Fliegt man allerdings sehr viel mit eingeschalteten Höhensensor, kann es von Vorteil sein, wenn der Gas-Stick auf "neutralisierend" eingestellt hat.<<BR>> Dieser also selbstständig in der Mittelposition bleibt.<<BR>> Lässt man dazu die Feder im Sender eingebaut, geht der Stick immer wieder in die Mittelstellung zurück (wie bei dem Nick/Rollstick).<<BR>> Vorteil: Mit eingeschaltetem Höhenregler im Vario-Modus ist das fliegen bequemer, weil man sich dann nicht selbst um die Gasstellung zum Schweben kümmern muss.<<BR>> Nachteil: Wenn man mit manuellem Gas fliegt, kann (darf) man den Stick nicht los lassen.<<BR>><<BR>> Ist der Stick auf "neutralisierend" eingestellt sollte dann diese Mittelstellung des Gas Stick als '''Stick neutral Punkt''' eingestellt werden. <<BR>> Normalerweise ist die Mittelstellung dann '''127'''.<<BR>> Dies kann aber je nach genutztem Sender unterschiedlich sein. Dafür ist die '''''GAS:''''' Anzeige rechts hilfreich.<<BR>> Hier wird dann die aktuelle Mittelstellung des Gas-Stick grafisch durch den Balken und den dazugehörige Wert angezeigt. Dieser Wert kann dann als '''Stick neutral Punkt''' eingetragen werden.<<BR>><<BR>> {{http://mikrocontroller.com/files/pictures/EasyCfg_pfeil.gif}}<<BR>> (Durch Klicken auf den Pfeil neben der aktuellen Gasanzeige kann man auch den aktuellen Gaswert in das Feld übertragen.) Auch bei dieser Einstellung gilt: <<BR>> * Gasstick in Höhe des Neutralpunktes: Keine Änderung der Soll-Höhe * Gasstick über dem Neutralpunkt: Steigen * Gasstick unter dem Neutralpunkt: Sinken == GPS == Das MKGPS kann über den Eintrag '''''GPS''''' aktiviert- oder deaktiviert werden.<<BR>><<BR>> '''Die Funktion:'''<<BR>> Wurde das GPS hier aktiviert, können Funktionen wie z.B. '''!PositionHold''' (PH) oder '''!ComingHome''' (CH) genutzt und über einen Schalter am Sender geschaltet werden. <<BR>> '''Hierfür wird ein 3-fach Schalter am Sender benötigt.''' <<BR>> Damit kann dann die jeweilige Funktion geschaltet werden => Die drei Schalterstellungen sind hierbei '''Aus - PH - CH'''. <<BR>> === GPS Modus Steuerung === Hier stellt man den Schalter ein, den man unter "Channels" zugewiesen hat (die Zuteilung (Überprüfung) der Kanäle findet man hier: [[Kanaleinstellung]]).<<BR>> In diesem Beispiel ist dem Schalter auf dem Sender "Poti2" (Kanal 6) zugeteilt.<<BR>> |
############################################################################## <<BR>><<BR>><<BR>> ---- == Setpoint == ##---------------------------------------------------------------------------- ## Bild rechts {{{#!html <div style="float: right; margin: 15px;"> }}} {{ http://gallery3.mikrokopter.de/var/albums/intern/KopterTool_ab_V2_0/Einstellungen_ab_2_14/Details/en/en_Auswahl_2.jpg?m=1467095340 }} {{{#!html </div> }}} ##---------------------------------------------------------------------------- {{ http://gallery3.mikrokopter.de/var/albums/intern/KopterTool_ab_V2_0/Einstellungen_ab_2_14/Details/en/en_H%C3%B6henregelung_Sollwert.jpg?m=1466752686 }}<<BR>> With the ''Setpoint'' you can use e.g a channel to activate the function ''[[en/AltitudeHold|AltitudeHold]]'' via your transmitter. Or you can set it e.g. to ON. Then the function ''[[en/AltitudeHold|AltitudeHold]]'' is the whole time ON. * '''Disabled''' <<BR>>~-''[[en/AltitudeHold|AltitudeHold]]'' disabled-~ * '''Ch1 ... Ch16''' <<BR>>~-Channel 1-16 => This is the channel you also use on your transmitter with a 2way switch to switch this function ON/OFF-~ * '''Ser Ch1 ... Ser Ch12''' <<BR>>~-Serial channel 1-12 => You can use a serial channel e.g. via your computer.-~ * '''WP Event''' <<BR>>~-Please do not use-~ * '''OFF''' <<BR>>~-''[[en/AltitudeHold|AltitudeHold]]'' disabled-~ * '''ON''' <<BR>>~-''[[en/AltitudeHold|AltitudeHold]]'' activated-~ <<BR>><<BR>> ~-'''Function''' If the function ''[[en/AltitudeHold|AltitudeHold]]'' is activated the barometric altitude sensor will control the motors and the altitude.<<BR>> |
| Zeile 91: | Zeile 165: |
=== Dynamic PositionHold === ##include_dph_begin Hier kann die Funktion "Dynamic !PositionHold" ein- oder ausgeschaltet werden. <<BR>> {{http://mikrocontroller.com/files/pictures/EasyCfg_dph.gif}}<<BR>><<BR>> Genutzt wird "Dynamic PositionHold" mit der Funktion !PositionHold. <<BR>><<BR>> '''Funktion aus:''' <<BR>> Der Kopter wird durch Bewegen des Nick- / Rollstick direkt gesteuert.<<BR>> Hierbei wird die Funktion PH ausgeschaltet wenn die Sticks bewegt werden. <<BR>> Und an der neuen Position, nach dem Loslassen der Sticks, wieder eingeschaltet.<<BR>><<BR>> '''Funktion an:''' <<BR>> Auch hier kann der Kopter durch Bewegen des Nick- / Rollstick auf eine neuen Position geflogen werden. <<BR>> Es werden hierbei die Sollwerte der GPS Koordinaten verschoben. Dadurch ist eine genauere Positionierung auch bei Wind möglich. Hierbei fliegt er die Positionen etwas langsamer an; bewegt sich also etwas träger. <<BR>><<BR>> {i} Hinweis: Ist per default an. Kann auch unter "EasySetup" oder "NaviControl2" abgeschaltet werden. |
Following applies: * Throttle stick centered => Copter will hold the current altitude * Throttle stick up => Copter goes up * Throttle stick down => Copter goes down When you move the throttle stick only a little bit up/down the copter will go up/down slow.<<BR>> Move the throttle stick more and the copter will go up/down faster.-~ ##---------------------------------------------------------------------------- ## Infotext: Aufheben des "Float" Befehl damit nachfolgende Eintragungen in neuer Zeile beginnen. {{{#!html <div style="clear:both"> }}} ##---------------------------------------------------------------------------- ############################################################################## <<BR>><<BR>><<BR>> ---- == Stick neutral point == {{ http://gallery3.mikrokopter.de/var/albums/intern/KopterTool_ab_V2_0/Einstellungen_ab_2_14/Details/en/en_H%C3%B6henregelung_Stick-Neutral.jpg?m=1466752705 }} {{ http://gallery3.mikrokopter.de/var/albums/intern/KopterTool_ab_V2_0/Einstellungen_ab_2_14/Details/en/en_H%C3%B6henregelung_GAS.jpg?m=1466752686 }}<<BR>> The ''Stick neutral point'' is the point where the throttle stick is centered. Here you can set a value or you center your stick and "click" on the green "Gas" symbol to set the right value. <<BR>> |
| Zeile 113: | Zeile 193: |
| ##include_dph_end === ComingHome altitude === In dieser Einstellung, kann eine Höhe eingetragen werden, die bei !ComingHome angeflogen wird. ##include_ch_begin {{http://mikrocontroller.com/files/pictures/EasyCfg_ch.gif}}<<BR>><<BR>> In der Funktion !ComingHome kommt der MikroKopter automatisch zum Startpunkt zurückgeflogen (sofern ein GPS-Fix vorhanden ist!). Hierbei kann er die vorher eingestellte Höhe anfliegen.<<BR>> Zusätzlich 'parkt' der Kopter dann auch noch in der voreingestellten Höhe bei erreichen der !ComingHome Koordinaten.<<BR>> Während des Anfluges wird bereits die eingestellte Höhe mit 3m/sek angeflogen - das kann man nicht verändern!<<BR>><<BR>> {i} '''Zu beachten:''' Die Höhe wird (wie bei den Höhenvorgaben der Waypoints) nur im Vario-Höhenregler angeflogen. Und auch nur, wenn der Gas-Stick in Neutrallage (Mittelstellung) ist.<<BR>><<BR>> '''Hierbei gilt:''' <<BR>> * 0: Aus -> die aktuelle Höhe des Kopters wird beibehalten. * 1-247: Wert in Metern -> diese Höhe wird sofort bei aktivieren von !ComingHome (CH) mit 3m/sek angeflogen. ##include_ch_end == Carefree Steuerung == In Verbindung mit dem GPS-System (!NaviCtrl, Kompass und GPS) kann die Funktion !CareFree genutzt werden.<<BR>> Diese Funktion kann auch mit einem Schalter am Sender ein-/ausgeschaltet werden. Der genutzte Schalter (den man unter "Kanäle" zugewiesen hat) kann hier eingestellt werden.<<BR>><<BR>> '''Die Funktion:'''<<BR>> Bei eingeschalteter Funktion wird die Steuerrichtung von Nick und Roll nicht mehr an der "Vorne"-Definition fest gemacht (Front/Ausleger 1 des Kopters), <<BR>> sondern an der Himmelsrichtung, in welche die Front/Ausleger 1 des MikroKopters während des Starten der Motoren zeigt. <<BR>> Damit kann man den MK gieren, ohne dabei die sonst mitrotierende Wirkung von Nick und Roll zu berücksichtigen. |
~- '''INFO'''<<BR>> Depending on the transmitter you use the throttle stick will center automatically or not. |
| Zeile 144: | Zeile 197: |
| === Teachable CareFree === Wenn "Teachable !CareFree" aktiviert ist, dann wird die !CareFree-'''Richtung''' jedes mal beim Einschalten des !CareFree-Schalters neu bestimmt. <<BR>><<BR>> '''Dabei wird unterschieden:''' <<BR>> * 1. Innerhalb von 20m um den Startpunkt gilt die '''Richtung''' der Front (Ausleger 1) des MikroKopters als vorne. Beim Einschalten der Funktion ist diese Richtung dann immer vorne, egal wie herum der Kopter sich dreht und wie weit weg er geflogen wird. <<BR>><<BR>> * 2. Außerhalb der 20m gilt die Peilung hin zum !ComingHome-Punkt (Startpunkt) als hinten und somit die entgegengesetzte Seite als vorne. Wird die Funktion hier eingeschaltet, ist es egal wie herum der Kopter gerade steht. Die aktuelle Richtung vom Kopter '''zum''' Startpunkt ist hinten; die entgegengesetzte Seite vorne.<<BR>><<BR>> So kann sich der Pilot jetzt auch auf der Stelle drehen und die !CareFree-Richtung durch den !Carefree-Schalter neu festlegt. <<BR>> Außerhalb der 20m muss er nicht einmal sehen, wo zu dem Zeitpunkt vorne war.<<BR>> Am Stick ziehen heißt dann immer: "Zurück zum Startpunkt" {i} Hinweis: Die neue CareFree-Richtung wird jedes mal beim '''einschalten''' von CareFree neu fest gelegt - also nur wenn der CareFree-Schalter bewegt wird.<<BR>><<BR>> |
If the throttle stick will center automatically it is perfect to use the function ''AltitudeControl'' => <<BR>> Activate the function ''[[en/AltitudeHold|AltitudeHold]]'' and center the throttle stick. Now the copter will hold automatically the current altitude. If your throttle stick can not center automatically you have to move it manually to the center place. Please not that if the stick is not centered the copter can climb up/down slow (or faster) depending on the stick position. -~ ############################################################################## <<BR>><<BR>><<BR>> ---- == Auto Start/Land Channel == ##---------------------------------------------------------------------------- ## Bild rechts {{{#!html <div style="float: right; margin: 15px;"> }}} {{ http://gallery3.mikrokopter.de/var/albums/intern/KopterTool_ab_V2_0/Einstellungen_ab_2_14/Details/en/en_Auswahl_1.jpg?m=1466753440 }} {{{#!html </div> }}} ##---------------------------------------------------------------------------- {{ http://gallery3.mikrokopter.de/var/albums/intern/KopterTool_ab_V2_0/Einstellungen_ab_2_14/Details/en/en_H%C3%B6henregelung_AutoStart-Land.jpg?m=1466752685 }}<<BR>> Set here a free channel for the function ''Auto Start/Land'' and use it with a 2way switch on your transmitter. * Disabled * ~-Auto Start/Land disabled-~ * Ch1 ... Ch16 * ~-Kanal 1-16 => This is the channel you also use on your transmitter with a 2way switch to use this function-~ <<BR>><<BR>> ~-'''Function''' <<BR>> The 2way switch on your transmitter use only 2 positions: * Switch OFF => Position LAND * Switch ON => Position START -~ |
| Zeile 160: | Zeile 237: |
| Weitere Informationen: [[CareFree|CareFree]] == Motor-Sicherheitsschalter == <<Include(include/KopterTool/Settings-Channels, , from="##include_mss_begin_de", to="##include_mss_end_de")>> == Mixer Setup == Je nachdem, ob ein QuadroKopter, ein HexaKopter oder ein OktoKopter gebaut wurde, muss der passende Mixer eingespielt werden.<<BR>> Hierüber bekommt die FlightControl Informationen über die Motorenanzahl und deren Anordnung. Dafür wird die sog. [[MixerTable|MischerTabelle]] verwendet.<<BR>><<BR>> <<Include(include/KopterTool/Settings-Mixer-SETUP, , from="##include_mix_begin_de", to="##include_mix_end")>> <<BR>> ---- . KategorieBeginner/en |
||||<class="MK_TableNoBorder" width="100%"(>__How to use__|| ||<class="MK_TableNoBorder" width=400px^>~-'''Auto-START''' <<BR>>- Your switch ios in position OFF (LAND)<<BR>>- activate Function ''[[en/AltitudeHold|AltitudeHold]]''<<BR>>- start the motors<<BR>>- center the throttle stick slow <<BR>>- move the 2way switch to ON (Start)<<BR>>(the switch will stay here for the flight!)<<BR>>- The motors will turn now faster and the copter lift up slow<<BR>> and hold the altitude in ~ 1-2m <<BR>>- fly your copter as you want-~||<class="MK_TableNoBorder" width=400px ^>~-'''Auto-LAND''' <<BR>>- fly the copter back to the landing place <<BR>>- center the throttle stick <<BR>>- move now the 2way switch back to OFF (Land)<<BR>>(the switch will now stay here!)<<BR>>- the copter goes down and land directly -> On the ground the motors will turn a little slower <<BR>>- switch off the motors-~|| ##---------------------------------------------------------------------------- ## Infotext: Aufheben des "Float" Befehl damit nachfolgende Eintragungen in neuer Zeile beginnen. {{{#!html <div style="clear:both"> }}} ##---------------------------------------------------------------------------- ############################################################################## ############################################################################## = GPS = Activate or deactivate here your GPS. {{ http://gallery3.mikrokopter.de/var/albums/intern/KopterTool_ab_V2_0/Einstellungen_ab_2_14/Details/en/en_GPS_OFF.jpg?m=1466752636 }} => GPS deactivated {{ http://gallery3.mikrokopter.de/var/albums/intern/KopterTool_ab_V2_0/Einstellungen_ab_2_14/Details/en/en_GPS_ON.jpg?m=1466752683 }} => GPS activated Only wit activated ''GPS'' you can use and switch functions like ''ComingHome'' or ''PositionHold''. ############################################################################## <<BR>><<BR>><<BR>> ---- == GPS Mode Control == ##---------------------------------------------------------------------------- ## Bild rechts {{{#!html <div style="float: right; margin: 15px;"> }}} {{ http://gallery3.mikrokopter.de/var/albums/intern/KopterTool_ab_V2_0/Einstellungen_ab_2_14/Details/en/en_Auswahl_3.jpg?m=1467095341 }} {{{#!html </div> }}} ##---------------------------------------------------------------------------- {{ http://gallery3.mikrokopter.de/var/albums/intern/KopterTool_ab_V2_0/Einstellungen_ab_2_14/Details/en/en_GPS_GPSModus.jpg?m=1466752635 }}<<BR>> Here you can set a channel for a 3way switch to switch the functions ''ComingHome'' and ''PositionHold''. Or you can set e.g. the function ''ComingHome'' or ''PositionHold'' still ON. * '''Disabled''' <<BR>>~-GPS-Function deactivated-~ * '''Ch1 ... Ch16''' <<BR>>~-Channel 1-16 => This is the channel you also use on your transmitter with a 3way switch to use this function-~ * '''Ser Ch1 ... Ser Ch12''' <<BR>>~-Serial channel 1-12 => You can use a serial channel e.g. via your computer.-~ * '''WP Event''' <<BR>>~-Do not use-~ * '''Free''' <<BR>>~-GPS-Function deactivated-~ * '''CH''' <<BR>>~-Function ''PositionHold'' is still activ-~ * '''PH''' <<BR>>~-Function ''ComingHome'' is still activ-~ <<BR>><<BR>> ~-'''Function''' <<BR>> Set here a free channel and use this channel on your transmitter with a free 3way switch. * 3way switch OFF <<BR>>=> GPS Function deactivated * 3way switch centered <<BR>>=> GPS Function ''PositionHold'' is activ -> The copter will hold the current place * 3way switch ON <<BR>>=> GPS Function ''ComingHome'' is activ -> The copter will fly back with 8m/s to the place where you start and lift off the copter (HomePosition) -~ ##---------------------------------------------------------------------------- ## Infotext: Aufheben des "Float" Befehl damit nachfolgende Eintragungen in neuer Zeile beginnen. {{{#!html <div style="clear:both"> }}} ##---------------------------------------------------------------------------- ############################################################################## <<BR>><<BR>><<BR>> ---- == Dynamic PositionHold == Here you can expand the function ''PositionHold'' with the function ''!DynamicPositionHold''. {{ http://gallery3.mikrokopter.de/var/albums/intern/KopterTool_ab_V2_0/Einstellungen_ab_2_14/Details/en/en_DynamicpositionHold_OFF.jpg?m=1466752633 }} => !DynamicPositionHold deactivated {{ http://gallery3.mikrokopter.de/var/albums/intern/KopterTool_ab_V2_0/Einstellungen_ab_2_14/Details/en/en_DynamicpositionHold_ON.jpg?m=1466752634 }} => !DynamicPositionHold activated ~-'''Function''' With activated function ''PositionHold'' the copter will hold automatically the current place. To fly to a other place move the Nick/Roll stick on your transmitter. During this you can now use the function ''!DynamicPositionHold''. * __WITHOUT__ ''!DynamicPositionHold''<<BR>>If you move the Nick-/Roll sticks to fly to a other position, the function ''PositionHold'' is deactivated automatically for the time you use the sticks.<<BR>> Here you have a fast movind to change the position. But the copter can also fly a little bit over the place where you will stop the copter. <<BR>> This depends on your handling of the sticks. * __WITH__ ''!DynamicPositionHold''<<BR>>When you now move the Nick-/Roll stick to change the position of the copter, the function ''PositionHold'' is __not__ deactivated. Now you move with the sticks a ''Target Point'' - a point the copter will follow.<<BR>> During this the copter is flying smoother and you can control it easier. -~ ############################################################################## <<BR>><<BR>><<BR>> ---- == ComingHome Altitude == {{ http://gallery3.mikrokopter.de/var/albums/intern/KopterTool_ab_V2_0/Einstellungen_ab_2_14/Details/en/en_GPS_CH-H%C3%B6he.jpg?m=1466752635 }}<<BR>> For the function ''ComingHome'' and ''[[en/FailSafe|FailSafe]]'' you can set here an "safety" altitude. If you use then the function ''ComingHome'' or in an case of an ''[[en/FailSafe|FailSafe]]'' the copter will use this altitude to fly back to the place where you start the copter (HomePosition). You can also deactivate this with a "0". <<BR>> If you then us the function ''ComingHome'' or n case of an ''[[en/FailSafe|FailSafe]]'' the copter will hold the current position and fly back to the place where you start the copter (HomePosition). <<BR>> ~-'''Function''' <<BR>> Activate the function ''ComingHome''. The copter will now directly fly back. During this the copter will climb up/down to the set altitude. If the signal is lost and the function ''[[en/FailSafe|FailSafe]]'' is active the copter will first go up/down to the set altitude and fly then back. More informations about the Function ''[[en/FailSafe|FailSafe]]'' you can read here: [[en/FailSafe|FailSafe]]. -~ ############################################################################## ############################################################################## = Carefree control = ##---------------------------------------------------------------------------- ## Bild rechts {{{#!html <div style="float: right; margin: 15px;"> }}} {{ http://gallery3.mikrokopter.de/var/albums/intern/KopterTool_ab_V2_0/Einstellungen_ab_2_14/Details/en/en_Auswahl_2.jpg?m=1467095340 }} {{{#!html </div> }}} ##---------------------------------------------------------------------------- {{ http://gallery3.mikrokopter.de/var/albums/intern/KopterTool_ab_V2_0/Einstellungen_ab_2_14/Details/en/en_CareFree-Steuerung.jpg?m=1466752632 }}<<BR>> For the function ''[[en/CareFree|CareFree]]'' you can set here a free channel. * '''Disabled''' <<BR>>~-[[en/CareFree|CareFree]] deactivated-~ * '''Ch1 ... Ch16''' <<BR>>~-Channel 1-16 => This is the channel you also use on your transmitter with a 2way switch to switch this function ON/OFF-~ * '''Ser Ch1 ... Ser Ch12''' <<BR>>~-Serial channel 1-12 => You can use a serial channel e.g. via your computer.-~ * '''WP Event''' <<BR>>~-Do not use-~ * '''OFF''' <<BR>>~-Function ''[[en/CareFree|CareFree]] deactivated-~ * '''ON''' <<BR>>~-Function ''[[en/CareFree|CareFree]] activatedv-~ <<BR>><<BR>> ~-'''Function''' <<BR>> Set here a free channel and set this channel also on a free 2way switch on your transmitter. Then you can use this function too: * 2way switch OFF <<BR>>=> Function ''[[en/CareFree|CareFree]]'' deactivated * 2way switch ON <<BR>>=> Function ''[[en/CareFree|CareFree]]'' activated More informations about the function ''[[en/CareFree|CareFree]]e'' you can find here: [[en/CareFree|CareFree]]. -~ ##---------------------------------------------------------------------------- ## Infotext: Aufheben des "Float" Befehl damit nachfolgende Eintragungen in neuer Zeile beginnen. {{{#!html <div style="clear:both"> }}} ##---------------------------------------------------------------------------- ############################################################################## <<BR>><<BR>><<BR>> ---- == Teachable CareFree == {{ http://gallery3.mikrokopter.de/var/albums/intern/KopterTool_ab_V2_0/Einstellungen_ab_2_14/Details/en/en_TeachableCarefree_OFF.jpg?m=1466752707 }} => Teachable !CareFree deactivated {{ http://gallery3.mikrokopter.de/var/albums/intern/KopterTool_ab_V2_0/Einstellungen_ab_2_14/Details/en/en_TeachableCarefree_ON.jpg?m=1466752707 }} => Teachable !CareFree activated <<BR>> ~-With ''Teachable !CareFree'' the function ''[[en/CareFree|CareFree]]'' is easier to use. <<BR>> Depending on the distance to the starting point you can use the function ''[[en/CareFree|CareFree]]'' now in 2 different ways.<<BR>> Around the starting point we use a 20 meter radius to change the function automatically. '''Function''' <<BR>> * The copter is __inside__ this 20 meter radius around the starting point<<BR>>If you now activate the function ''[[en/CareFree|CareFree]]'' the copter will set the "forward direction" in the direction where the red rigger (front) of the copter points. During the whole flight this direction is forward (no matter in which direction the copter turns). * The copter is __outside__ this 20 meter radius around the starting point<<BR>>If you now activate the function ''[[en/CareFree|CareFree]]'' the copter will set a "line" between the starting point and the position where the copter is (no matter in which direction the copter points). This "line" if forward/backward. During the whole flight this direction is forward/backward (no matter in which direction the copter turns). Mehr Infos zur Funktion sind hier nachzulesen: [[en/CareFree|CareFree]] -~ ############################################################################## ############################################################################## = Mixer-SETUP = {{ http://gallery3.mikrokopter.de/var/albums/intern/KopterTool_ab_V2_0/Einstellungen_ab_2_14/Details/en/en_Mixer-SETUP.jpg?m=1467208424 }}<<BR>> Depending on the design of your copter and the number of used motors the right mixer must be loaded.<<BR>> The mixer will set the number of used motors and also the direction of rotation. <<BR>><<BR>> This mixers are already include the !MikroKopter-Tool: ||<class="MK_TableNoBorder">'''Quadro.mkm'''||<class="MK_TableNoBorder">'''Quadro-X.mkm'''||<class="MK_TableNoBorder">'''Hexa.mkm'''||<class="MK_TableNoBorder">'''Hexa2.mkm'''||<class="MK_TableNoBorder">'''Hexa-X.mkm'''|| ||<class="MK_TableNoBorder">{{ http://gallery3.mikrokopter.de/var/albums/intern/KopterTool_ab_V2_0/Mixer/Quadro.jpg?m=1467206203 }}||<class="MK_TableNoBorder">{{ http://gallery3.mikrokopter.de/var/albums/intern/KopterTool_ab_V2_0/Mixer/Quadro-X.jpg?m=1467206204 }}||<class="MK_TableNoBorder">{{ http://gallery3.mikrokopter.de/var/albums/intern/KopterTool_ab_V2_0/Mixer/Hexa.jpg?m=1467206183 }}||<class="MK_TableNoBorder">{{ http://gallery3.mikrokopter.de/var/albums/intern/KopterTool_ab_V2_0/Mixer/Hexa2.jpg?m=1467206184 }}||<class="MK_TableNoBorder">{{ http://gallery3.mikrokopter.de/var/albums/intern/KopterTool_ab_V2_0/Mixer/Hexa-X.jpg?m=1467206184 }}|| ||<class="MK_TableNoBorder">'''Okto.mkm'''||<class="MK_TableNoBorder">'''Okto2.mkm'''||<class="MK_TableNoBorder">'''Okto2b.mkm'''||<class="MK_TableNoBorder">'''Okto3.mkm'''||<class="MK_TableNoBorder">'''Okto-U.mkm'''|| ||<class="MK_TableNoBorder">{{ http://gallery3.mikrokopter.de/var/albums/intern/KopterTool_ab_V2_0/Mixer/Octo.jpg?m=1467206185 }}||<class="MK_TableNoBorder">{{ http://gallery3.mikrokopter.de/var/albums/intern/KopterTool_ab_V2_0/Mixer/Octo2.jpg?m=1467206185 }}||<class="MK_TableNoBorder">{{ http://gallery3.mikrokopter.de/var/albums/intern/KopterTool_ab_V2_0/Mixer/Octo2b.jpg?m=1467206186 }}||<class="MK_TableNoBorder">{{ http://gallery3.mikrokopter.de/var/albums/intern/KopterTool_ab_V2_0/Mixer/Octo3.jpg?m=1467206202 }}||<class="MK_TableNoBorder">{{ http://gallery3.mikrokopter.de/var/albums/intern/KopterTool_ab_V2_0/Mixer/Octo-U.jpg?m=1467206202 }}|| <<BR>><<BR>><<BR>> |
Diese Seite befindet sich derzeit in der Überarbeitung. |
|
EasySetup - Easy SETUP |
.jpg?m=1466430971)
Inhaltsverzeichnis
Overview -> Easy Setup
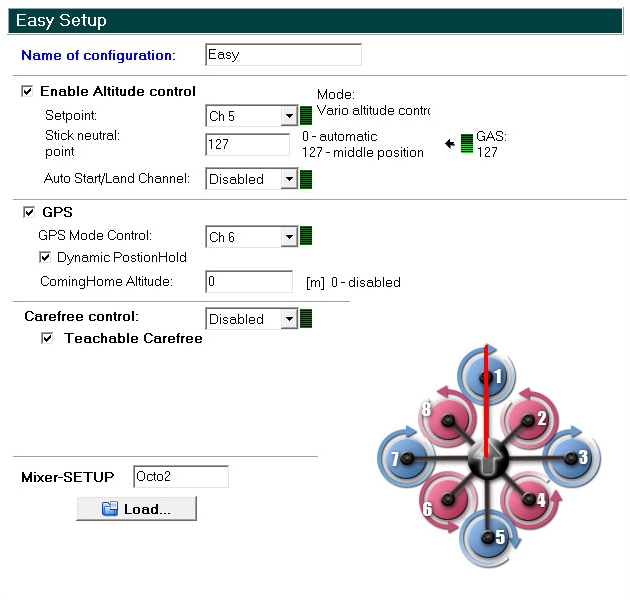
Name of the configuration
You can set and save up to 56 different settings (Parametersets) in your copter.
If needed a personal name you can enter here.

In the basic settings the names are:
Parameterset 1 => Fast
Parameterset 1 => Agile
Parameterset 1 => Easy
Parameterset 1 => Easy
Parameterset 1 => Easy
Enable Altitude control
Here you can activate / deactivate the barometric altitude sensor on the FlightCtrl.
 => altitude sensor deactivated
  => altitude sensor activate
 If the barometric altitude sensor is deactivated you have to hold the altitude of the copter the whole time manually.
Only if the sensor is activated you can use the function AltitudeHold and activate this e.g. via a switch on your transmitter.
Then the copter can hold the altitude automatically.
Setpoint


With the Setpoint you can use e.g a channel to activate the function AltitudeHold via your transmitter. Or you can set it e.g. to ON. Then the function AltitudeHold is the whole time ON.
Disabled
AltitudeHold disabledCh1 ... Ch16
Channel 1-16 => This is the channel you also use on your transmitter with a 2way switch to switch this function ON/OFFSer Ch1 ... Ser Ch12
Serial channel 1-12 => You can use a serial channel e.g. via your computer.WP Event
Please do not useOFF
AltitudeHold disabledON
AltitudeHold activated
Function
If the function AltitudeHold is activated the barometric altitude sensor will control the motors and the altitude.
Following applies:Throttle stick centered => Copter will hold the current altitude
Throttle stick up => Copter goes up
Throttle stick down => Copter goes down
When you move the throttle stick only a little bit up/down the copter will go up/down slow.
Move the throttle stick more and the copter will go up/down faster.
Stick neutral point


The Stick neutral point is the point where the throttle stick is centered. Here you can set a value or you center your stick and "click" on the green "Gas" symbol to set the right value.
INFO If the throttle stick will center automatically it is perfect to use the function AltitudeControl =>
Depending on the transmitter you use the throttle stick will center automatically or not.
Activate the function AltitudeHold and center the throttle stick. Now the copter will hold automatically the current altitude. If your throttle stick can not center automatically you have to move it manually to the center place. Please not that if the stick is not centered the copter can climb up/down slow (or faster) depending on the stick position.
Auto Start/Land Channel


Set here a free channel for the function Auto Start/Land and use it with a 2way switch on your transmitter.
- Disabled
Auto Start/Land disabled
- Ch1 ... Ch16
Kanal 1-16 => This is the channel you also use on your transmitter with a 2way switch to use this function
- Disabled
Function
The 2way switch on your transmitter use only 2 positions:Switch OFF => Position LAND
Switch ON => Position START
How to use
Auto-START
- Your switch ios in position OFF (LAND)
- activate Function AltitudeHold
- start the motors
- center the throttle stick slow
- move the 2way switch to ON (Start)
(the switch will stay here for the flight!)
- The motors will turn now faster and the copter lift up slow
and hold the altitude in ~ 1-2m
- fly your copter as you wantAuto-LAND
- fly the copter back to the landing place
- center the throttle stick
- move now the 2way switch back to OFF (Land)
(the switch will now stay here!)
- the copter goes down and land directly -> On the ground the motors will turn a little slower
- switch off the motors
GPS
Activate or deactivate here your GPS.
 => GPS deactivated
  => GPS activated
 Only wit activated GPS you can use and switch functions like ComingHome or PositionHold.
GPS Mode Control


Here you can set a channel for a 3way switch to switch the functions ComingHome and PositionHold. Or you can set e.g. the function ComingHome or PositionHold still ON.
Disabled
GPS-Function deactivatedCh1 ... Ch16
Channel 1-16 => This is the channel you also use on your transmitter with a 3way switch to use this functionSer Ch1 ... Ser Ch12
Serial channel 1-12 => You can use a serial channel e.g. via your computer.WP Event
Do not useFree
GPS-Function deactivatedCH
Function PositionHold is still activPH
Function ComingHome is still activ
Function
Set here a free channel and use this channel on your transmitter with a free 3way switch.3way switch OFF
=> GPS Function deactivated3way switch centered
=> GPS Function PositionHold is activ -> The copter will hold the current place3way switch ON
=> GPS Function ComingHome is activ -> The copter will fly back with 8m/s to the place where you start and lift off the copter (HomePosition)
Dynamic PositionHold
Here you can expand the function PositionHold with the function DynamicPositionHold.
 => DynamicPositionHold deactivated
  => DynamicPositionHold activated
 Function
With activated function PositionHold the copter will hold automatically the current place. To fly to a other place move the Nick/Roll stick on your transmitter. During this you can now use the function DynamicPositionHold.
WITHOUT DynamicPositionHold
If you move the Nick-/Roll sticks to fly to a other position, the function PositionHold is deactivated automatically for the time you use the sticks.
Here you have a fast movind to change the position. But the copter can also fly a little bit over the place where you will stop the copter.
This depends on your handling of the sticks.WITH DynamicPositionHold
When you now move the Nick-/Roll stick to change the position of the copter, the function PositionHold is not deactivated. Now you move with the sticks a Target Point - a point the copter will follow.
During this the copter is flying smoother and you can control it easier.
ComingHome Altitude

For the function ComingHome and FailSafe you can set here an "safety" altitude. If you use then the function ComingHome or in an case of an FailSafe the copter will use this altitude to fly back to the place where you start the copter (HomePosition).
You can also deactivate this with a "0".
If you then us the function ComingHome or n case of an FailSafe the copter will hold the current position and fly back to the place where you start the copter (HomePosition).
Function
Activate the function ComingHome. The copter will now directly fly back. During this the copter will climb up/down to the set altitude.
If the signal is lost and the function FailSafe is active the copter will first go up/down to the set altitude and fly then back.
More informations about the Function FailSafe you can read here: FailSafe.
Carefree control


For the function CareFree you can set here a free channel.
Disabled
CareFree deactivatedCh1 ... Ch16
Channel 1-16 => This is the channel you also use on your transmitter with a 2way switch to switch this function ON/OFFSer Ch1 ... Ser Ch12
Serial channel 1-12 => You can use a serial channel e.g. via your computer.WP Event
Do not useOFF
Function CareFree deactivatedON
Function CareFree activatedv
Function
Set here a free channel and set this channel also on a free 2way switch on your transmitter. Then you can use this function too:More informations about the function CareFreee you can find here: CareFree.
Teachable CareFree
 => Teachable CareFree deactivated
  => Teachable CareFree activated
With Teachable CareFree the function CareFree is easier to use.
Depending on the distance to the starting point you can use the function CareFree now in 2 different ways.
Around the starting point we use a 20 meter radius to change the function automatically.Function
The copter is inside this 20 meter radius around the starting point
If you now activate the function CareFree the copter will set the "forward direction" in the direction where the red rigger (front) of the copter points. During the whole flight this direction is forward (no matter in which direction the copter turns).The copter is outside this 20 meter radius around the starting point
If you now activate the function CareFree the copter will set a "line" between the starting point and the position where the copter is (no matter in which direction the copter points). This "line" if forward/backward. During the whole flight this direction is forward/backward (no matter in which direction the copter turns).Mehr Infos zur Funktion sind hier nachzulesen: CareFree
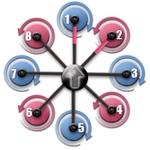
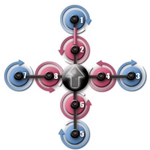
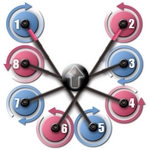
Mixer-SETUP

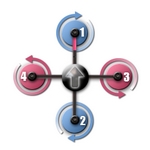
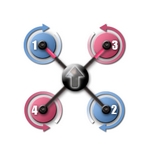
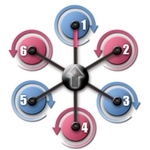
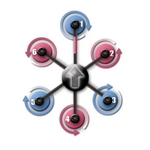
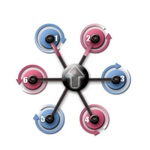
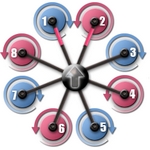
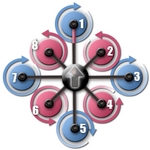
Depending on the design of your copter and the number of used motors the right mixer must be loaded.
The mixer will set the number of used motors and also the direction of rotation.
This mixers are already include the MikroKopter-Tool:
Quadro.mkm |
Quadro-X.mkm |
Hexa.mkm |
Hexa2.mkm |
Hexa-X.mkm |
|
|
|
|
|
Okto.mkm |
Okto2.mkm |
Okto2b.mkm |
Okto3.mkm |
Okto-U.mkm |
|
|
|
|
|

