|
Größe: 11995
Kommentar:
|
Größe: 11995
Kommentar:
|
| Gelöschter Text ist auf diese Art markiert. | Hinzugefügter Text ist auf diese Art markiert. |
| Zeile 4: | Zeile 4: |
| ||<tablewidth="400px" tablestyle="text-align: center;"bgcolor="#ffffa0"> {{http://mikrokopter.de/images/deu.gif}} Seite in [[Sender|deutsch]] ||<bgcolor="#ffffa0"> {{http://mikrokopter.de/images/fra.gif}} Page en [[fr/Sender|français]] || | ||<tablewidth="520px" tablestyle="text-align: center;"bgcolor="#ffffa0"> {{http://mikrokopter.de/images/deu.gif}} Seite in [[Sender|deutsch]] ||<bgcolor="#ffffa0"> {{http://mikrokopter.de/images/fra.gif}} Page en [[fr/Sender|français]] || |
Inhaltsverzeichnis
general
Basically, each transmitter with more than four channels can be used for MikroKopter.
Only the receiver must provide a PPM sum signal. This is required by the FlightCtrl.
A normal receiver with servo outputs can not be connected!
If there is no receiver with a PPM sum signal for your transmitter, you can use a QuadroPPM12. This can be connected to the receiver output and generating a PPM composite signal.
The range between the transmitter and receiver depends on the used transmitter / receiver. For more detailed information of the range please ask the manufacturer.
For the greatest possible range, the receiver shall not be shielded or covered mounted.
how much channels
The first four channels are needed for the control of the Kopter. The channels are preset as follows:
- Channel 1 = Throttle
- Channel 2 = Roll
- Channel 3 = Nick
- Channel 4 = Yaw
Depending on how many channels offered by the transmitter, further functions can be used.
For each function, such as for example keeping the height, the GPS functions "PositionHold" and "ComingHome", "CareFree", the nick of the camera mount and other functions, required an additional channel.
Mode1-4
There are four different control options for transmitter. They are called Mode1, Mode2, Mode3 and Mode4.
These four "Mode" have different throttle, yaw, pitch, roll.
To control the Kopter, the easiest way is Mode2. Especially if you don't have experience in aircraft model before.
On Mode2 throttle an yaw are on the left stick, nick and roll on the right stick.
Normally you can change the mode1-4 of the transmitter. How to change you will find in the manual of the transmitter
If you are using also a different Mode, you can use it too.
![]() Info:
Info:
- Throttle: please be sure the throttle is "non-neutralizing". If a clip is located at the Stick you have to remove it. More details you find on the manual of the transmitter.
- Idle means throttle is down (to the pilot), full throttle corresponds to up or away from the pilot.
- It is recommended that the gas "sliding", because the gas is very sensitive.
Servo test
Control of the channels and the function of the transmitter:
For this, the receiver must be properly connected with the FlightCtrl and the transmitter is turned on.
After the FlightCtrl was supplied with power, after a short time only the green LED lights.
Also lit the red light, the following may cause an error:
- Cables from the receiver is not soldered correctly.
- the recipient is not bound to the transmitter.(at 2,4GHz)
- the receiver- / transmitter crystal is not OK.(at 35MHz)
- the transmitter has set the wrong channel.(at 35MHz)
in KopterTool the right receiver is not set to channels.
The copter is now connected via MK-USB to the PC. After starting the KopterTool and recognize the FlightCtrl, klick on Settings to select [[http://mikrokopter.de/ucwiki/MK-Parameter/Channels|Channels].<<BR>> Here you can prufe the function of the individual channels.
For a transmitter with more than four channels, the remaining channels can assigned to switches or potentiometer. How to do this, the manual of the transmitter will help.
Also theese channels you can check in the KopterTool under "Channels".
Model memory
You can store flight models with varying features as "helicopter" or "flat" in the transmitter.
Even if it is the MikroKopter a Kopter, please don't use a heli model. Here you can use mixer which will influence the functions of the copter negative.
The easiest way to save the Copts of a flat model.
Transmitter
Merkmal |
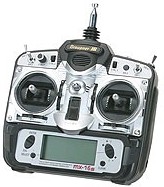
Graupner MX-16s |
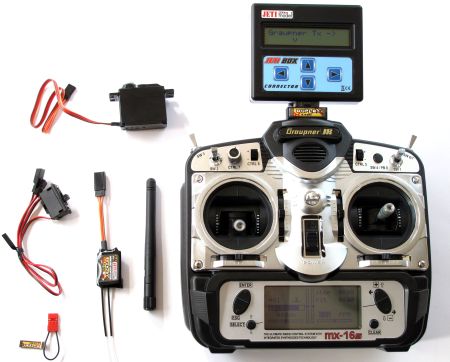
Graupner Mx-16s Jeti Set |
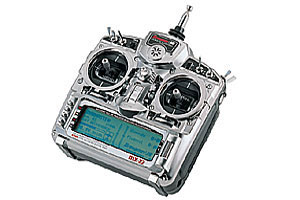
Graupner Mx-22s |
Graupner Mx-16s Jeti Set |
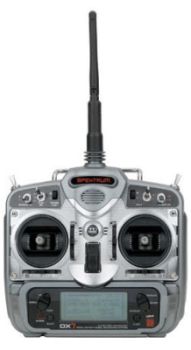
Spectrum DX7 |
Picture |
|
|
|
|
|
Channels |
35MHz, 8 Channels |
2,4GHz, 8 Channels, Transmission of telemetry data |
35MHz, 12 Channels |
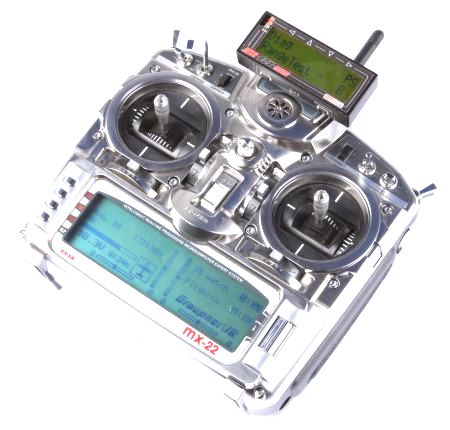
2,4GHz, 12 Channels, Transmission of telemetry data |
2,4GHz, 7 Channels |
Shop Link |
|||||
Receivers |
Info about the Transmitter
The technical characteristics of the stations are listed in the shop. More detailed information can be found in the manufacturer's website.
Graupner MX-16s / MX-16s Set Jeti
The MX-16s and the MX-16s set Jeti differ only by the transmitter. The adjustment functions are the same.
The transmitter MX-16s is a 35MHz Transmitter. On this you can connect a 35MHz receiver with a crystal. The transmitter don't need a crystal. He got a Synthesizer-modul. So you can easy change the channels.
The transmitter MX-16s Set Jeti is a 2,4GHz transmitter. Inside the transmitter you have a Jeti-transmitter. On this you can connect each Jeti receiver (like the RMK2). The advantage of this system lies in the binding between the transmitter and receiver. On this it is not possible to disrupt the connection between the two from outside. In addition, the telemetry of the Kopter (height, battery charge, range, etc.) can be transfered and displayed on the Jeti box.
Quick Links:
![]() here you can read how to setup the MX16s/MX16s Set Jeti.
here you can read how to setup the MX16s/MX16s Set Jeti.
The settings should be chosen so that the channels match the settings of the FlightCtrl. Nevertheless, check!
Graupner MX-22 / MX-22 Set Jeti
The MX-22 and the MX-22 set Jeti differ only by the transmitter. The adjustment functions are the same.
The transmitter MX-22 is a 35MHz Transmitter. On this you can connect a 35MHz receiver with a crystal. The transmitter don't need a crystal. He got a Synthesizer-modul. So you can easy change the channels.
The transmitter MX-22 Set Jeti is a 2,4GHz transmitter. Inside the transmitter you have a Jeti-transmitter. On this you can connect each Jeti receiver (like the RMK2). The advantage of this system lies in the binding between the transmitter and receiver. On this it is not possible to disrupt the connection between the two from outside. In addition, the telemetry of the Kopter (height, battery charge, range, etc.) can be transfered and displayed on the Jeti box.
Setup of the MX-22
A brand new MX-22 needs a few settings
Changing stick mode to "mode 2" (gas left)
We recommend the stick mode 2 (see above). That is usually the easiest way to control a MikroKopter.
Therefore the mechanically stick neutralisation of the sticks must be changed (if not already done) Please refer the enclosed manual for that (Page 15)
Now the control mode must be changed in the setup of the transmitter.
ENT -> go into the setup
Reel -> go to "Base setup model" -> press the reel
- keep reel pressed ans scroll to "Stick mode"
- Press reel and scroll to "2"
ESC -> leave menu
Set modulation to PPM24
ENT -> go into the setup
Reel -> go to "Base setup model" -> press the reel
- keep reel pressed ans scroll to "Modulation"
- Press reel and scroll to "PPM24"
ESC -> leave menu
choose actualtors for the channels
ENT -> go into the setup
Reel -> go to "Control adjust" -> press the reel
- keep reel pressed ans scroll to the channel you want to change
- before the next step, please put the switch into the desired off-position; in exsample towards you
- Press reel and switch the switch into the on-position
- do the same with all actuators
ESC -> leave menu
Exsample channel setting:
Channel 5 -> two-stage switch 2 (SW2) -> i.e. Altitude control
Channel 6 -> three-stage switch 7 (Control 7) -> i.e. for GPS
Channel 7 -> Drehpoti links (Control 10) -> i.e. camera-angle
Channel 8 -> two-stage switch 1 (SW1) -> i.e. CareFree
Channel 9 -> three-stage 8 (Control 8)
Channel 10 -> two-stage switch 7 (SW7) -> i.e. LED Lights
Channel 11 -> two-stage switch left (Control 6) -> i.e. camera-angle
Channel 12 -> two-stage switch 8 right side (SW8) -> i.e. camera shutter
At the end you should check the setup in the channel-setup of the MikroKopter
Spectrum DX7
The transmitter Spektrum DX7 is a 2,4GHz channel. At the transmitter, a receiver and a satellite-receiver can be operated.
The receiver who the servos can be connected, can not be used on the copter!
Only the little Satelliten-receiver can be used. How to connect it you find here: Spectrum
more transmitter
more infos for more transmitter you can find here: Weitere Sender

 Seite in
  Page en