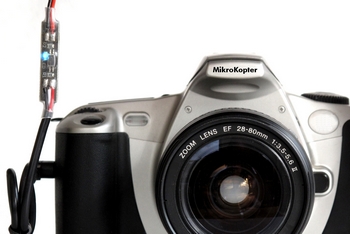
ShutterCable |

Inhaltsverzeichnis
See also: MikroKopter-Boards
Shoplink: Shuttercable 2.5mm
Shoplink: Shuttercable N3
General
High-quality DSLR or Bridge cameras usually have an input for a remote trigger. Depending on the camera model the sockets are different.
Available are Shuttercable for:
|
|
|
Canon 2.5mm |
Canon N3 |
Nikon MC-30 |
|
|
|
Nikon MC-DC2 |
Panasonic |
Sony Multi |
Function
To trigger the shutter Cable, we need 5V DC voltage. For this we connect the Shuttercable with the switching output of our FlightCtrl. If we now switch this outup with our transmitter, we have 5V here and the Shuttercable works. Then the blue LED on the Shuttercable is ON. The Optokoppler on the Shuttercable provides an electrical isolation between FlightCtrl and camera. So no voltage is given from the outside to the camera.
INFO: You can not connect the Shuittercable directly to a receiver!
Connection
The 2.5mm jack or the N3 plug are connected with the used camera.
The red BEC socket are connected with the switching output "OUT1" of our FlightCtrl. In this case, the red cable is plugged into the middle pin and the black wire on the right pin:
To open -> Click on image or text |
||||||||
If you use the BL-Ctrl PCB V3 on your copter and you use OUT2 to switch the LED's, the gray cable from the PCB is on the left and the Shuttercable on the right side.
To open -> Click on image or text |
||||||||
Settings
To control the Shuttercable with the remote control you need a free channel on it.This channel you can set to a push button on your transmitter. The same channel we also have to set in the settings for OUT1 in the KopterTool.
Transmitter
On your transmitter you have to set a free channel to a push button. If you then use this push button it will react in the same way as if you push the trigger button on your camera.
If there is no push button on your transmitter, you can also use a switch. If you use the switch it is the same as if you press and hold the trigger button on your camera.
For this example we use channel 11. How to set the channel on your Gaupner HoTT or Jeti transmitter you can see here:
If you use a different manufacturer, please take a look at the manual of your transmitter.
Copter
The same channel we also have now to set for "OUT1". For this we have to open "Output".
Since you can assign this output now a fixed number or a channel. A channel is assigned the to a "Poti". Channel 11 is the Poti7. This Poti7 we have not to set under Out1 Timing.
And that the switching output is not connected at rest, we disable the box Idle with one click.
To open -> Click on image or text |
||||||||
In the last step we can set a "switching sequence" with the Bitmask. With this switching sequence we can switch the Shuttercable during a Waypoint fly automatically (Link) (see INFO).
The single boxes can be activated or deactivated by clicking with the mouse on it. In addition activate the entry combine with WP-event.
To open -> Click on image or text |
||||||||
INFO: Each red box is a switching operation of the switching output. If you plan a waypoint fly (Link) you can set for each Waypoint a "Waypoint Event". The number you set her is the time each boy activate / deactivate the switching output.
Example: The boxes are set maybe in this way: OFF, ON, ON, OFF, ON, ON, OFF. For your waypoint fly you have set the Wegpunkte Event with 50 (=0,5 Seconds).
If now the copter reach the waypoint during a waypoint fly, the switching output will switch the Shuttercabel in this way:
0,5s OFF, 0,5 ON, 0,5s ON, 0,5s OFF, 0,5s ON, 0,5s ON, 0,5s OFF.
This switching sequence is then repeated as long as the DelayTime of the copter at this waypoint is.


