|
Größe: 16423
Kommentar:
|
Größe: 2299
Kommentar:
|
| Gelöschter Text ist auf diese Art markiert. | Hinzugefügter Text ist auf diese Art markiert. |
| Zeile 1: | Zeile 1: |
| ||<tablewidth="300px" tablestyle="text-align: center"#ffffa0> {{http://mikrocontroller.cco-ev.de/images/deu.gif}} Seite in [[NaviCtrl|deutsch]] {{http://mikrokopter.de/images/fra.gif}} Page en [[fr/NaviCtrl|français]] || | #acl AdminGroup:read,write,revert EditorsGroup:read,write,revert All:read {{{#!wiki MK_Nav ||<class="MK_Nav_Header">NaviCtrl|| }}} {{{#!wiki MK_select1 * {{http://mikrokopter.de/images/deu.gif}} [[NaviCtrl|deutsch]] * {{http://mikrokopter.de/images/fra.gif}} [[fr/NaviCtrl|français]] }}} <<BR>> See also: [[en/MK-Board|MikroKopter-Boards]] <<BR>><<BR>> The NaviCtrl expands with the compass module and the MKGPS the ability of the MikroKopter.<<BR>> Throughout the use of those modules you will get a powerful GPS-System. <<BR>><<BR>> '''Shoplink: [[https://www.mikrocontroller.com/index.php?main_page=index&cPath=69&zenid=624904f1acf4307d900b9689300ec2c0|NaviCtrl]]''' <<BR>><<BR>> A description of the !NaviCtrl you can find here: <<BR>><<BR>> |
| Zeile 4: | Zeile 26: |
| See Also: [[en/MK3Mag|MK3Mag]], [[en/MKGPS|MKGPS]] <<TableOfContents>> <<BR>> | ## Ebene1 |
| Zeile 6: | Zeile 28: |
| <<BR>> '''Version 1.x:''' [[http://gallery.mikrokopter.de/main.php/v/tech/NaviCtrl_MKGPS.jpg.html|{{http://gallery.mikrokopter.de/main.php?g2_view=core.DownloadItem&g2_itemId=20394|http://gallery.mikrokopter.de/main.php/v/tech/NaviCtrl_MKGPS.jpg.html}}]] '''Version 2.0:''' [[http://gallery.mikrokopter.de/main.php/v/tech/NC2_0_c.jpg.html|{{http://gallery.mikrokopter.de/main.php?g2_view=core.DownloadItem&g2_itemId=84479}}]] (The MK3Mag is not needed in the NC2.0) = Overview = The NaviCtrl together with the MK-GPS extends the abilities of the Mikrokopter. The following features are possible: <<Include(en/MKGPS, , from="^##gps_features$", to="^##gps_features_end$")>> Besides an ARM9-Mikrocontroller and Mikro-SD-Card-Socket, the NaviCtrl-Board is also equipped with expansion sockets for future developments. See also: [[en/Firmware-0.84| Firmware 0.84]] (Waypoints, PointOfInterest,...) Shoplink: [[https://www.mikrocontroller.com/index.php?main_page=product_info&cPath=69&products_id=631|Navi2.0]] {i} You can use the Navi with MKGPS Version 1.x, as well as 2.x = Version 2.0 = [[http://gallery.mikrokopter.de/main.php/v/tech/NC2_0_connect.jpg.html|{{http://gallery.mikrokopter.de/main.php?g2_view=core.DownloadItem&g2_itemId=84482}}]] Compared to the NC1.x there are the following changes: * black colour * integrated compass-Sensor -> MK3Mag not neede any more * integrated EEPROM * changed bootloader == integrated compass == A compass sensor is integrated now. It must be still calibrated (see below) After switching on, in the terminal you can see a found compass-module: [[http://gallery.mikrokopter.de/main.php/v/tech/NC2_0_Start.jpg.html|{{http://gallery.mikrokopter.de/main.php?g2_view=core.DownloadItem&g2_itemId=84487}}]] == Showing the sensor values == The values can be shown in the virtual display {{http://gallery.mikrokopter.de/main.php?g2_view=core.DownloadItem&g2_itemId=84488&g2_serialNumber=1}} {i} the Button 'MK3Mag' in the Koptertool (to switch to the MK3Mag), has no function for the NC2.0 == self test == After switching on, the NC makes a self-test of the sensor. If there is too much iron or magnets close to the sensor, it could be that the selftest failes. In that case the Error message is "Invalid compass value" or "selftest: failed" in the terminal. = Connection to the MikroKopter = The NC is connected via two ribbon cables (6 and 10 poles) to the FC. [[http://gallery.mikrokopter.de/main.php/v/tech/NC_connect2.jpg.html|{{http://gallery.mikrokopter.de/main.php?g2_view=core.DownloadItem&g2_itemId=84537}}]] [[http://gallery.mikrokopter.de/main.php/v/tech/NC_connect.jpg.html|{{http://gallery.mikrokopter.de/main.php?g2_view=core.DownloadItem&g2_itemId=84533}}]] * 1: 10-Poles UART (Asynchronous serial communication) * 2: 6-Poles SPI (Synchronous serial communication) * 3: Connection to MKGPS * 4: Connection to MKUSB (PC) = Compass calibration = <<Include(en/MK3Mag, , from="^##include_cal_start$", to="^##include_cal_stopp$")>> = Setup = == Activate the GPS and select a transmitter-switch == To use the Navigation, the following steps are needed: === activate GPS in the FC-Settings === {{http://gallery.mikrokopter.de/main.php?g2_view=core.DownloadItem&g2_itemId=84544&g2_serialNumber=1}} === Assign a switch in the FC-Settings === {{http://gallery.mikrokopter.de/main.php?g2_view=core.DownloadItem&g2_itemId=84546&g2_serialNumber=1}} Here a 3-steps-switch should be used. = GPS-Modes = There are 3 modes that can be selected with "GPS Mode Control". GPS_MODE_AID, GPS_MODE_FREE and GPS_MODE_HOME. == GPS_MODE_FREE == (GPS_Mode_Control-switch below 20) * No GPS effect == GPS_MODE_AID (or Position Hold) == (GPS_Mode_Control-switch between 20 and 200) * the GPS has a supportive effect * The GPS-speed complements the pilots commands and where applicable acts with a slowing/braking effect. * When no elevator or roll controls are given by the pilot, the MK will hold its current position. * The new position will be logged when the MK falls below a certain speed or after no more than 4 seconds. * A beep will indicate the logging of a new position == GPS_MODE_HOME == (GPS_Mode_Control > 200) * Coming Home --> Fly back to originating position * The position during the start of the motors is logged as Home '''Warning:''' When !ComingHome is used to fly back to yourself, the altitude control must be active otherwise it will drop down and may continue to accelerate down.<<BR>><<BR>> '''Tip:''' Generally the GPS will only work well when the altitude control is active. Otherwise the vertical accelerations brought by with the control movements will confuse the Acc-Sensors to much.<<BR>> '''Tip2:''' Since 0.71c of FC Code and 0.12 of NC Code, you can combine GPS and Altitude Control Switch. Then Alt-Control is active <50 and >180. So in FREE Mode the Alt Control is off and in AID and PH it's on. = Signal tones = * 1x per second: no sat-fix (not in GPS-Free-mode) * 1x Piep - everytime the gps-mode is changed (the mode-switch changes) * 1x Piep *Piiiiiiep* - Long beed - setting the home position = LED-Display = The NaviCtrl has 2 LED’s, 1x red and 1x green. An constant red LED indicates an error. = How do you start? = 1. activate the GPS in the setting and assign a switch (as described above) 1. You need a lot of space and a free sky 1. Checking the communication between Navi and FlightCtrl. * Beeping (1* per second) will continue as long as the GPS has no Fix * Once the GPS has a Fis, a beep will sound when changes are made with the mode switch 1. Wait for first Fix * Until LED on GPS start to flash * Beeping will continue every second until 6 satellites have been found * Beep is more quiet when a Fix has been obtained but still no 6 satellites found 1. Check the GPS-Switch - it must beep once when changing the modd (moving the GPS-switch) 1. Switch to '''GPS_MODE_FREE''' * Change of Mode will be indicated by a beep 1. Start Motors * Hover for a few seconds until the MK flies well without trimming. 1. Switch to '''GPS_MODE_AID''' * Position will be logged * GPS should now grab and the Kopter will hover at its position. = MicroSD-card = . The NaviCtrl logs the flight route in KML format on FAT16 formatted MicroSD-cards up to 2GB in size. . A recognized and initialized SD-card can be seen in the NaviCtrl initialization messages. . {{attachment:NaviCtrl/nc-sd-init.png}} == showing the logged data in GoogleEarth == [[http://gallery.mikrokopter.de/main.php/v/tech/GoogleEarth.jpg.html|{{http://gallery.mikrokopter.de/main.php?g2_view=core.DownloadItem&g2_itemId=84552}}]] The data can be imported in [[http://www.google.com/earth/index.html|GoogleEarth]] == SETTINGS.INI == The NC crates a SETTING.INI-File onto the card with the following contents: {{http://gallery.mikrokopter.de/main.php?g2_view=core.DownloadItem&g2_itemId=84548&g2_serialNumber=1}} * KMLLOGGING = 500 (Intervall (in ms) of logging the KML-data) * GPXLOGGING = 1000 (Intervall (in ms) of logging the GPX-data) * GPSAUTOCONFIG = 1 (1 = the NC writes the GPS-confiration (temporary) into the MKGPS) {i} do not use logging times below 500ms - that could disturbe the navigation = Assembly of final parts for NC 1.x = The following items are included with the NaviCtrl and need to be assembled by yourself: * 1 Electrolyte Capacitor (C1, check polarity!) * 2 Pin Rows (1x 10pole for FlightCtrl, 1x6pole for SPI-Interface) * Multistrand ribbon for connection to MKGPS with fitted plugs * 2 Multistrand ribbon (1x 10pol and 1x6pol for connection with FlightCtrl) * 1 Pin Row for Debug (1x 10pole, e.g. for Software-Update) '''Installation Instructions''' Install the NaviCtrl so that the 6 pole connector is above the 6 pole connector of the FC and the 10 pole connector is above the 10 pole connector of the FC. <<BR>> Use the 10 pole and 6 pole Ribbon to connect to the Flight Ctrl.<<BR>> NaviCtrl-'''SV8''' <-> !FlightCtrl-'''SV1''' and <<BR>> NaviCtrl-'''SV6''' <-> !FlightCtrl-'''SV5''' /!\ For installation of the MK3Mag and MKGPS please follow instructions under [[en/MK3Mag|MK3Mag]] and [[en/MKGPS|MKGPS]]. = Settings = /!\ Kompass and GPS must be activated in the relevant settings. == Parameters for GPS-Naviboard in Koptertool (Tab1) == {{http://www.mikrokopter.de/files/Navicfg.gif}} == GPS-Gain (Controller Gain) == This sets, how strong the GPS should influence. If it is too high, the position will swing. The value should be determined experimentally by assigning this setting to a Poti (adjustable auxiliary channel on transmitter). == Stick Threshold == This can be used to adjust the threshold for GPS-AID, where a new position will be logged. Useful: If the '''value is set to 0''', it will not log using stick postition, but only by switching the '''Mode-Switch''' Fly to the desired position and switch to AID. You can then play with the sticks and the MK will still continue to return to its set position. Especially in windy conditions this can be used to prevent that the MK even starts to drift. == Min Sat == Minimum number of satellites that need to be detected by the GPS receiver. == Parameter GPS-P == P-component of the Control Influence of the GPS-distance on the controller (Higher Value = greater tilting during drift from a position) == Parameter GPS-I == I-component of the Control Elliminated the constant positional drift during wind (Higher Value = greater tilting during prolonged positional drift) == Parameter GPS-D == D-Component of the Control Influence of the GPS-Speed on the Controller (Higher Value = Slower movement) == Parameter GPS ACC == Support of positioning with the Acc sensors. If the MK is pushed away it will react faster. --> Slowly and gradually work towards higher values(use Poti) == Parameters for GPS-Naviboard in Koptertool (Tab2) == [[http://gallery.mikrokopter.de/main.php/v/tech/NaviCtrl_2_MKTool-v1_63.png.html|{{http://gallery.mikrokopter.de/main.php?g2_view=core.DownloadItem&g2_itemId=33472|http://gallery.mikrokopter.de/main.php/v/tech/NaviCtrl_2_MKTool-v1_63.png.html}}]] (Screenshot Mikrokopter-Tool v1.63) ToDo: complete descriptions == GPS Wind Correction == Because of cross-winds a deviation from actual heading to the set heading can be created. With this parameter a correction angle is taken to minimize the deviation. It controlls the amount of influence of this compensation. A value of 0 means the function is turned of. == Speed Compensation == This is the "D-Anteil" during a break-phase in '''GPS_MODE_AID''' after manual intervention.''' '''A higher value makes the MK break harder after a manual control before he sticks to the set-position.''' ''' == GPS Max Radius == This value defines a circle shaped area around the starting position. Only inside this area position-targets (like waypoints) can be set. If the position is outside of this area, the target will be set onto coordinates on this radius which are the closest to the "outside"-target. The maxiumum length of this radius is 255meters. This is equal to an area of 512m in diameter around the point where the motors of the MK were started. '''''notice:''''' for PositionHold(PH) there is no range limit (using latest firmware) == GPS Angle Limit == delimits the maximum influence of the GPS. A value of 100 equals about 20 degrees of inclination in an axis. With a too small value it could happen that the MK will not be strong enough against winds and drift away. A too large value might end in a too high speed == Position Hold Login Time == delay in seconds between the end of manual control (nick/roll in neutral) and the sticking to the set position in '''GPS_MODE_AID'''. |
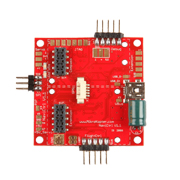
||<-5 tablewidth="99%" tablestyle="text-align: center;" class="MK_TableNoBorder">'''To open -> Click image or text'''|| ||<class="MK_TableNoBorder"width="40%">||<class="MK_TableNoBorder">[[en/NaviCtrl_2.1|{{ http://gallery3.mikrokopter.de/var/albums/intern/sonstiges/Button-Baugruppe/1_Button180x180/Button-NaviV2_1.jpg?m=1446564507 }}]]||<class="MK_TableNoBorder"width="40%">|| ||<class="MK_TableNoBorder"width="40%">||<class="MK_TableNoBorder":>'''[[en/NaviCtrl_2.1|NaviCtrl V2.1]]'''||<class="MK_TableNoBorder"width="40%">|| ||<class="MK_TableNoBorder" height="40px">|| |
| Zeile 250: | Zeile 34: |
| = How do I Install new software into the NaviCtrl ? = 1. You solder a pin row on the '''Debug''' interface position of the NaviCtrl and connect this to the Sercon’s SIO position. Ensure that '''No''' Jumper is attached to the Sercon. |
## Ebene2 |
| Zeile 253: | Zeile 36: |
| 1. Connect the FC with the NaviCtrl using the 10 and 6 pole connectors. Now turn on the Mikrokopter. 1. Start Mikrokopter-Tool >=1.51 and click on ''Update Software (seriell)''. Select the .hex file. 1. The Update procedure starts and should be complete in about 1-2 minutes. After this you can see the arrival of debug data in the terminal. == What if installing new firmware went wrong? == If for some reason installing new firmware went wrong or was aborted, and NaviCtrl no longer responds to the Mikrokopter-Tool, retry installation using the sequence below: 1. Remove power from NaviCtrl. 1. Without power on NaviCtrl, click on ''Update Software (seriell)'' and select the appropriate .hex file. 1. Wait for the message ''Connecting (ggf. Resetten)'' to appear. 1. As soon as the message appears, power up NaviCtrl and the installation should start. = Circuit Scheme & Assembly diagram & bill of material = [[attachment:NaviCtrl/Navi-Ctrl_V1_1.pdf|{{attachment:NaviCtrl/NaviCtrl_Schaltplan_V1_1_mini.gif|attachment:NaviCtrl/Navi-Ctrl_V1_1.pdf}}]] <<BR>> [[attachment:NaviCtrl/Navi-Ctrl_V1_1.pdf]] <<BR>> BOM: [[attachment:NaviCtrl/Navi-Ctrl_V1_1_Stueckliste.txt]] = How do I update new NaviCtrl software ? = 1. You solder a pin header to the '''debug''' interface on the NaviCtrl and connect it to the SerCon's SIO interface. Make sure the jumper on the SerCon is removed. 1. Connect the FlightCtrl's 10-pin and 6-pin connectors with the NaviCtrl. Turn on the Kopter. 1. Start the Mikrokopter-Tool (version >=1.51) then click ''Update Software (seriell)''. The .hex data is then transferred. 1. The update starts and takes about 1-2 minute to complete. At the end you can see the debug data in the terminal. Note that if the serial communication is interrupted during the transfer, the next attempt may hang. To overcome this, just switch the MK's power off then on when the message "" appears. ''If there are several successive Firmware updates to be made, the sequence plays a role. Program the devices in the following sequence: '' 1. ''Navi-Ctrl_STR9_V0_14e.hex'' 1. ''Flight-Ctrl_MEGA644_V0_72p.hex'' 1. ''MK3Mag_MEGA168_V0_21b_SVN48.hex '' = Debug interface and KopterTool = Solder a pin header to the Debug interface of the NaviCtrl and connect this to the Sercon's SIO interface. Make sure there is no Jumper on the Sercon. Switch on the MK and start the KopterTool. In the terminal mode, you should see the starting sequence of the NaviCtrl: <<BR>> [[http://gallery.mikrokopter.de/main.php/v/tech/NaviCtrl_BootUp.jpg.html|{{http://gallery.mikrokopter.de/main.php?g2_view=core.DownloadItem&g2_itemId=23562|http://gallery.mikrokopter.de/main.php/v/tech/NaviCtrl_BootUp.jpg.html}}]] <<BR>> The last lines are the Debug data, they can be ignored. Here you can see whether all the interfaces and/or devices are correctly initialized. In the Koptertool the NaviCtrl parameters are then available:<<BR>> . [[http://gallery.mikrokopter.de/main.php/v/tech/NaviCtrl_KopterTool.jpg.html|{{http://gallery.mikrokopter.de/main.php?g2_view=core.DownloadItem&g2_itemId=23564|http://gallery.mikrokopter.de/main.php/v/tech/NaviCtrl_KopterTool.jpg.html}}]] . <<BR>> Screenshot of the main parameters: * GPS-Data Counter: the GPS connection state is indicated (GPS count should increase) * SPI Error and SPI Okay: the SPI connection to the FlightCtrl is indicated (Okay count should increase) * Poti1,2,3: the transmitter potentiometer values can be checked * ACC, angle, etc. is probably self explaining <<BR>> The parameters can also be displayed in the Scope when connecting the FlightCtrl. A "setup" for the NaviCtrl is not possible (the button is grayed out). <<BR>><<BR>> /!\ ToDo: A few more things need to be added here <<BR>> ---- . KategorieEnglish |
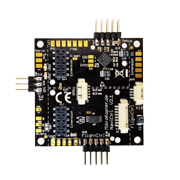
||<-5 tablewidth="99%" tablestyle="text-align: center;" class="MK_TableNoBorder">'''To open -> Click image or text'''|| ||<class="MK_TableNoBorder"width="40%">||<class="MK_TableNoBorder">[[en/NaviCtrl_1.1|{{ http://gallery3.mikrokopter.de/var/albums/intern/sonstiges/Button-Baugruppe/1_Button180x180/Button-NaviV1_1.jpg?m=1446564506 }}]]||<class="MK_TableNoBorder">||<class="MK_TableNoBorder">[[en/NaviCtrl_2.0|{{ http://gallery3.mikrokopter.de/var/albums/intern/sonstiges/Button-Baugruppe/1_Button180x180/Button-NaviV2_0.jpg?m=1446564507 }}]]||<class="MK_TableNoBorder">||<class="MK_TableNoBorder"width="40%">|| ||<class="MK_TableNoBorder"width="40%">||<class="MK_TableNoBorder":>'''[[en/NaviCtrl_1.1|NaviCtrl V1.1]]'''||<class="MK_TableNoBorder">||<class="MK_TableNoBorder":>'''[[en/NaviCtrl_2.0|NaviCtrl V2.0]]'''||<class="MK_TableNoBorder"width="40%">|| ||<class="MK_TableNoBorder" height="40px">|| |
See also: MikroKopter-Boards
The NaviCtrl expands with the compass module and the MKGPS the ability of the MikroKopter.
Throughout the use of those modules you will get a powerful GPS-System.
Shoplink: NaviCtrl
A description of the NaviCtrl you can find here:
To open -> Click image or text |
||||
To open -> Click image or text |
|||||


