Inhaltsverzeichnis
Introduction
MoteCtrl is a small terminal-based programm written by Alpin, which lets you control your MikroKopter with a Wiimote. You can download the full release package, including the sources, here.
Please read the READ_ME_NOW.txt file before using MoteCtrl.
Description
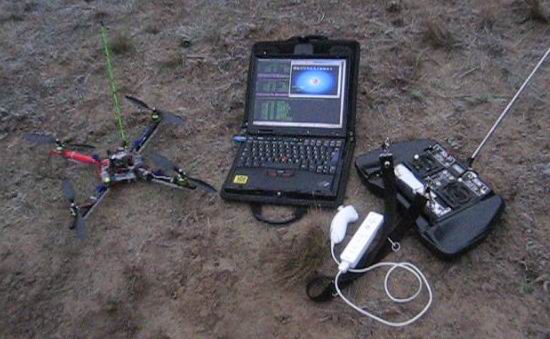
MoteCtrl is a small terminal-based programm, which acts as an interface to the Wiimote and the MikroKopter platform. The MikroKopter is usually controlled by a normal 35MHz remote control. However, the FlightControl software also allows you to control your MikroKopter with a so called ExternControl struct, which is send via the serial communications line. MoteCtrl.exe, running on your windows pc, exactly does this. It captures the Wiimote's and Nunchuck's (extension to the wiimote) data and transfers it to the FlightCtrl.
What you need
MikroKopter with at least FlightCtrl firmware version 0.71h running
wireless serial communication to the FlightCtrl via Bluetooth (I use the F2M03GXA Bluetooth modul, with the wireless UART service activated, see http://www.mikrokopter.de/ucwiki/F2M03GXA for more information
- Wiimote with Nunchuck extension
- Laptop running windows xp
- Bluetooth-dongle or build-in bluetooth communications in your laptop
Since I use the wiiuse lib v0.12 to connect to the Wiimote, your bluetooth stack should be compatible with the wiiuse lib. On their page wiiuse.org they say, they successfully tested wiiuse with BlueSoleil, Windows XP SP2 stack and Widcomm (my BT-dongle uses the BlueSoleil stack and it works fine)
- Backup Pilot at the 35MHz Remote Control (see =Usage=)
MoteCtrl.exe along with the wiiuse.dll file (both in one folder)
Short Checklist
(for more detailed step by step instructions, see =Usage of MoteCtrl=)
MK ready?, ExternalControl switch assigned?, Backup pilot ready?
- Nunchuck plugged in to Wiimote? (software check does not work yet, seems to be a bug in the wiiuse API)
BT connections to Wiimote (HID service running) and MikroKopter (Serial Port Service running) established?
Controls
- GAS: Controlled by the two buttons on the Nunchuck extension ('c' and 'z').
- Press 'c' = Increment(++) gas value by 1
- Press 'z' = Decrement(--) gas value by 1
- YAW(GIER): Controlled by the Nunchuck's joystick.
- Pressed to the right half = yaw to the right
- Pressed to the left half = yaw to the left
- The more you push the joystick to one of the two directions, the MK yaws faster.
- PITCH(NICK): Controlled by the Wiimote's pitch-tilt.
- Tilting your Wiimote to the left means, tilting the Quadro left.
- To the right accordingly.
- ROLL: Controlled by the Wiimote's roll-tilt.
- Same like with pitch.
- SPECIAL: You can reset the GAS value immediatly to ZERO (==no gas!!) with the HOME-Button. Be carefull with that!
Usage of MoteCtrl - Step by Step
Preparations
- Make sure that all the items listed under "What you need" work
To allow external control you have to allocate a switch of your normal 35MHz RemoteCtrl to the "External Control" variable in the MikroKopter-Tool. You should find this option in the MK Tool -> Configuration/Settings
Explanation: Your normal Remote Control is always used as a backup device, in case the operator at the Wiimote looses control of the Quadrokopter or the Bluetooth connection is somehow interruted. Therefore the backup pilot at the 35MHz control can pass the control to the pilot with the Wiimote via his "external control" switch. If he feels that the Quadro is out of control or the connection is interrupted he just flips the switch back, gets control himself again and can rescue the poor -out of control- MikroKopter ![]()
Flight
Turn your MikroKopter and your normal remote on. Make sure everything is running perfectly (perhaps do a "normal" test flight to check everything's ok)
- Establish the wireless UART connection to your Mikrokopter with your Bluetooth stack. The BT stack should assign a windows COM Port to the established connection, so you can access it (make sure Serial Port Service is running). You need to remember the NUMBER OF THE COM PORT, e.g COM4. So you established the link to your MK.
- Next establish the connection to the Wiimote:
- Press both, the 1 and 2 Button at the same time. All the 4 LEDs should be blinking now. Your wiimote is now in "discovery mode", which means it is searching for a little Nintendo Wii to pair with it.
- Now we are (or our BT stack is) the Wii: While the wiimote is in discovery mode search for devices in your BT stack program. You should find the wiimote now. Do NOT pair with it. Rather search for services the wiimote offers. This should bring up the HID (Human Interface Device) service offer. Check that the wiimote is still in discovery mode (only 30 seks active) and activate the HID service. You should now be connected with the wiimote and the 4 leds of the wiimote should still blink but shouldn't stop blinking anymore.
So the BT stack is now connected to both, the Wiimote and the MK (BT can connect up to 7 devices at a time). Now start the MoteCtrl.exe via a windows commandline. Make sure you put the wiiuse.dll in the same folder like MoteCtrl.exe, otherwise the program will return immediatly without an error message (and you think huh?).
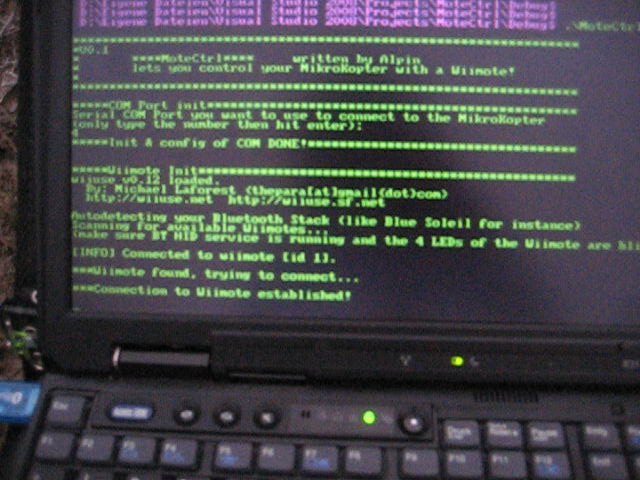
- Next you should be asked for your COM Port number, which is linked to your MK. Type in the number, hit enter.
Next is the Wiimote initalizaition. If you your HID service is running everything should be fine now and MoteCtrl connects to it.
Your Wiimote should rumble now for a sek and the LEDs should have stopped blinking (now only LED 1 is permanently on). --> This tells you, that MoteCtrl established the connection to the Wiimote successfully.
- You should now see the DEBUG Output scrolling down your terminal screen.
First familiarize yourself with the new Wiimote's and Nunchuck's controls, with the engines of the MK deactivated. Watch the Debug output changing its values while you play with the Wiimote & Nunchuck. For Controls, see the chapter =Controls=.
Flight: Your MAX GAS is always limited by the gas value, which is set at the backup pilot's 35MHz remote. So the backup pilot "gives you a limit" of the GAS value. The backup pilot can now pass the control up to you by using his "External Control" switch

Useful Tips & Practical Experiences
- It often happens that the connection to the Wiimote or the MK can't be established with your bt stack. Just disconnect everything then and try to reconnect all the devices.
- While paring your MK's bluetooth with the one of your laptop place the MK text to your laptop. Bluetooth has a very limited range.
The Bluettoth's range is very limited. Don't fly far away from your Laptop! This will definitely interrupt or cancel your connection (at least your backup pilot will have a bit of fun then

- Don't go far away from your laptop with you wiimote in hand. Same like above.
Credits & Thx
Holger & Ingo for the MikroKopter Project (www.mikrokopter.de)
ExternalControl implementation of the FlightControl
- Ligi for RIDDIM, proof of external control concept
Documentation of the MK's SerialProtocol http://www.mikrokopter.de/ucwiki/en/SerialProtocol
- Michael Laforest for the wiiuse API
Sources
Discussion Thread
http://forum.mikrokopter.de/topic-7222.html

