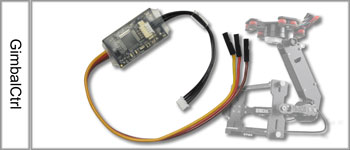
Shoplink: GimbalCtrl
Inhaltsverzeichnis
INFO
The following software version is required for the operation of the GimbalCtrl: - FlightCtrl + NaviCtrl V2.20 or later
- AlexMos V2.66b2 or later
GimbalCtrl
The GimbalCtrl controls nick, roll and yaw of an AlexMos Brushless Gimbal.
Optionally, up to 3 switching outputs can be used (e.g. to trigger a photo camera).
During a waypoint flight you can control the angle for nick exactly. The nick- and roll angle will also be recorded in the LOG-File and also in TXT-File.
Connection
Connection FlightCtrl
Connection AlexMos
On your AlexMos-Board we use the serial "RC"-input (GND, RC_Rx and RC_Tx).
This has the advantage that you can optionally connect e.g. a Bluetooth connection via the serial input.
Setting AlexMos
First you activate the serial RC-input under RC settings
RC_ROLL pin mode => SBGC Serial API
The GimbalCtrl need a serial speed of 9600 Baud.
This you can set under Hardware
RC_SERIAL_port speed => 9600
The speed for Main serial port speed and UART2 port speed can stay at 11520 Baud.
If you use e.g. a Bluetooth connection on the normal serial port you can use the fast speed.
For a 3-axes gimbal you have also to activate FollowYAW under Follow mode.
Setting KopterTool
Nick-Roll-Yaw
To control the Funktion nick, roll and yaw via the GimbalCtrl you need 3 free channels.
You can setup this channes under Camera (nick, roll) and CamCtrl (YAW Channel) in the KopterTool.
Switching outputs
Optionally, up to 3 switching outputs can be used.
- Out1
Pad1 (switch to GND)
Pad3 (switch to 3,3V)
- Out2
Pad8 (switch to GND)
Pad4 (switch to 3,3V)
- Trigger
Pad9 (is working parallel with the Output "Out1" in your MikroKopter)
So you can e.g. trigger a camera or running a script in your AlexMos gimbal.
INFO: The switching outputs are max. 100mA loadable !!!
Do you want to switch more load (z.B. LED-Streifen) please use e.g. a ExtensionPCB.
With the KopterTool you can set the switching output Out1/Out2 with a free channel.
(CamCtrl -> Out1/Out2)
The switching output "Trigger" is parallel with the "switching output 1" of your FlightCtrl.
GimbalCtrl - LED
the GimbalCtrl has a red and green led:
green LED => ON
red LED => fast flashing
=> GimbalCtrl is connect via I2C on your FlightCtrl. Brushless Gimbal was not recognized (the connection is wrong, gimbal is OFF ...)
green LED => flashing slow
red LED => OFF
=> GimbalCtrl is connect via I2C on your FlightCtrl. Brushless Gimbal was detected.
I2C-Adapter for 3-axes Gimbal
On an 3-axes gimbal you can damage external routed cable if you yaw the gimbal.
It the gimbal offers 4 free wires via the sliding contact in the yaw motor you can also route the I2C bus down to the gimbal.
In the example on the right you can see how the I2C bus can be looped through.
To make such an adapter you need:
- 1x I2C-Bus Splitter
- 2x Servo cable extension
- 1x 4pol Molex cabel
If this is done you can use on the gimbal the GimbalCtrl and also the CamCtrl at the same time.
So you use several functions over only a few cables and prevents entanglement while yawing the gimbal.
Angle
If you control a gimbal with a servo connection, the set angle (in a waypoint flight) is not the real angle. The number you set for the angle is added to the servo value.
With the GimbalCtrl you can set and use now the real angle. So when you set e.g. 90 for the angle, the gimbal will look 90° down.
LOG-File - TXT-File
The inclination of the gimbal for nick and roll in degrees is stored continuously in the LOG file in the column Gimbal.
In addition, the nick / roll angle is recorded in the extra TXT file for each triggered photo.
Separate supply with two Lipos
The GimbalCtrl has a high-impedance protective resistor between the GND terminals. If you use now one Lipo for your copter and a seperate lipo only for your brushless gimbal you have to connect the GND of both lipos together. Otherwise the GimbalCtrl will not work.
Attention: Make sure that the polarity is correct when connecting.


