This page as an PDF-Document? Click on that Symbol and wait a little moment... --->

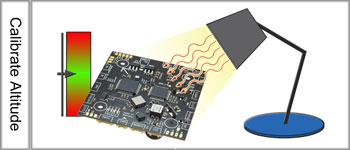
CalibrateAltitude

Calibrate barometric altitude sensor


http://gallery3.mikrokopter.de/var/albums/intern/sonstiges/Button-Baugruppe/Button350x150/Button_CaliAltitude.jpg?m=1485874367


Calibrate barometric altitude sensor

!!! The following settings apply only to FlightCtrl V3.0 - Older FlightCtrl versions can not be calibrated !!!


The barometric height sensor is required for automatic holding of the height of the MikroKopter.
The sensor should be calibrated once. Thus, the sensor is working properly even under temperature fluctuations (factor = x cm per °C).

If the sensor is not calibrated, the copter can vary in height.

Recalibration of the height sensor is not usually necessary.

INFO: Before the FlightCtrl was delivered, the altitude sensor has already been calibrated.


Calibration

For calibration of the barometric height sensor, a heat source is required.
This can be e.g. a lamp or a hair dryer.

IMPORTANT: The heating MUST be SLOW.


The calibration is done in a few steps:

Step

Example view

Step 1

The heat source (switched off) is positioned over the FlightCtrl.
(You can remove the GPS if you want - then heating is a little faster.)

http://gallery3.mikrokopter.de/var/thumbs/intern/AltitudeCalibration/CalibrateAltitude-LampeAUS.jpg?m=1485942778

Step 2

Connect the copter now with your computer.
(via MK-USB or wireless)

Start the KopterTool and power up the copter.
(also switch on the transmitter)

http://gallery3.mikrokopter.de/var/thumbs/intern/AltitudeCalibration/Copter-PC.jpg?m=1485942779

Step 3

Click the button "NaviCtrl" in the KopterTool.
In the virtual window press the red arrow (left or right) and change the view to "Barometer".

http://gallery3.mikrokopter.de/var/thumbs/intern/AltitudeCalibration/CalibrateAltitude-Step1.jpg?m=1485944116

Step 4

When you see "Barometer" press the red arrow (up) under "(CAL)" and start the calibration.

http://gallery3.mikrokopter.de/var/thumbs/intern/AltitudeCalibration/CalibrateAltitude-Step2.jpg?m=1485944117

Step 5

Now switch on the heat source.

http://gallery3.mikrokopter.de/var/thumbs/intern/AltitudeCalibration/CalibrateAltitude-LampeAN.jpg?m=1485942778

The virtual display shows now "Warm up slowly" and the temperature increases slowly.

http://gallery3.mikrokopter.de/var/thumbs/intern/AltitudeCalibration/CalibrateAltitude-Step3.jpg?m=1485944117

If this is to fast (it is to hott) you see the error "Heater off!"

Remove then the heat source and wait until the error is gone.
If all is OK replace the heat source again with more space.

http://gallery3.mikrokopter.de/var/thumbs/intern/AltitudeCalibration/CalibrateAltitude-Step4.jpg?m=1485944118

Step 6

If the heating is carried out correctly, an "Okay" appears after some time. in the lower right corner you see also a "save".

To save the calibration press the red arrow (up) under save.

http://gallery3.mikrokopter.de/var/thumbs/intern/AltitudeCalibration/CalibrateAltitude-Step5.jpg?m=1485944118

The calibration is complete.

http://gallery3.mikrokopter.de/var/thumbs/intern/AltitudeCalibration/CalibrateAltitude-Step6.jpg?m=1485944119


Check calibration / manual adjustment

In the window "Temperature settings" you can check the stored value and also change it.

!! If you change the value manually you can also have a negative effect during altitude hold - better use the automatic calibration!!!

Step

Example view

Beside the button "Settings" you find a smal arrow down. With this arrow you can open the window "Temperature settings".

http://gallery3.mikrokopter.de/var/thumbs/intern/AltitudeCalibration/CalibrateAltitude-manual.jpg?m=1485878339